At Action Bevel, we excel in all types of beveled glass and mirrors. Our automated equipment allows us to grind and polish bevels up to 1-1/4″ on most thicknesses. Additionally, our hand beveling group specializes in shaping diverse pieces, ranging from large round mirrors to ornamental bevels adorning splendid glass windows. We take pride in delivering exceptional clarity and polish for a radiant bevel.
Clear Beveled Glass
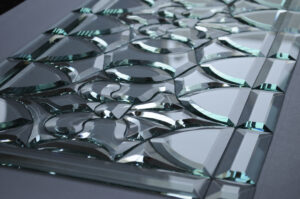
Clear Beveled Glass: The First Step to Elegance Our expertise extends beyond beveling, as we skillfully assemble beveled pieces into striking standalone decorative mirrors or leaded panels for windows and doors. To meet location and code specifications, we offer triple glazed and tempered insulated glass units. For creative ideas, explore our door and panel designs at https://actionbevels.com/product-category/square-panel-designs/ or https://actionbevels.com/product-category/door-panel-designs/ or https://actionbevels.com/entryways/
Inspired Project: Making Stunning Beveled Glass Mirrors Our latest project draws inspiration from Scott Poynter at The Glass Factory in Owensboro, Kentucky.
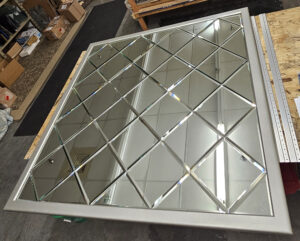
It showcases the beauty of simple shapes like square diamonds and triangles, which can be ingeniously combined to create sophisticated designs.
Crafting the Perfect Pattern . We are going to use Scott’s example and talk about that.

Crafting the Perfect Pattern To ensure precise production, we create the best pattern using CAD programs like Adobe Illustrator. Uniform pieces can fit seamlessly onto the pattern when the glass cutter sets up a jig to cut perfect angles according to the design. Be sure to eliminate any burrs on the glass edges to maintain mitered corners during beveling. Angling the edges slightly using a belt sander adds a touch of finesse.
The Importance of a Sturdy Substrate
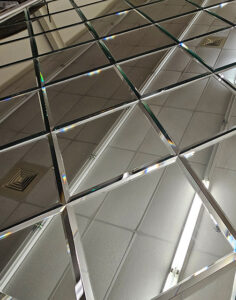
One key feature, apart from the beveled mirror, is the substrate to which the mirror is attached. It must be sturdy and non-flexible to prevent undue stress on the glass edges and eliminate the risk of shells forming. Ensuring a small 1/32″ gap or beveling the edges between the mirror pieces keeps the upper edges from touching, avoiding pressure points. We recommend using a solid 3/4″ birch or two sheets of 1/2″ birch glued together, with the grain running at 90 degrees to each other.
More Topics:
Applying the mirrored bevels to the substrate,
All about mastic,
Framing.
Hanging the piece on a wall.
Transporting and shipping.
Applying Mirrored Bevels to the Substrate

When the substrate is ready, place it on a flat surface to avoid any potential curves. Starting from the center and moving outward toward the edges, apply a few dollops of mastic, ensuring it doesn’t run up into the seams or affect the mirror silvering on the back. Choose a mastic suitable for mirroring to prevent oxidation and maintain the mirror’s integrity.
Framing the Mirror.

Adding Substance and Style Adding a frame enhances the panel’s aesthetics by hiding the edges and accentuating the pattern. Oversizing the panel allows mounting the frame with some excess wood on the edges. Installing the frame with precision is crucial, ensuring no gaps are created in the miters.
Hanging with Finesse
French Cleat Hanger
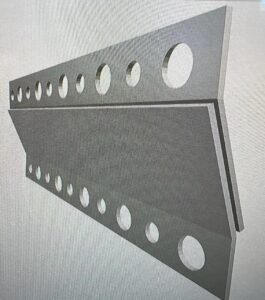
French Cleat Hangers. Thoughtful preparation is essential for wall installation. If screws are needed through the same side as the glass, counter-sink them before mirror application. French Cleat Hangers are ideal for heavy artwork, reaching across multiple studs for secure mounting. Aligning cleats on the panel and wall ensures a straight and level installation.
Transporting and Shipping.

The Weight Consideration These projects can be heavy, weighing approximately 6 pounds per square foot, including glass, panel, frame, and hangers. When transporting, standard construction tools for jigs and supports are essential to ensure secure shipping.